Connect a WhatsApp number to Pingly
8 min read
Nothing in Pingly works until a WhatsApp number is connected. There are three ways to do it, and they are genuinely different products underneath — this page is mostly about choosing correctly, because switching later is more work than choosing well now.
Which one do you want?
| Meta Cloud API | WhatsApp Direct (QR) | Gupshup | |
|---|---|---|---|
| How it connects | Officially, through your own Meta Business account. | By scanning a QR code, like WhatsApp Web. | Through your existing Gupshup account. |
| Set-up time | Under an hour, if your Facebook Business is verified. | About two minutes. | Minutes, if the account already exists. |
| Templates | Yes — required outside the 24-hour window. | No. Free-form messages only. | Yes. |
| Green tick possible | Yes. | No. | Yes. |
| Who bills the messages | Meta bills you directly. | Nobody — there are no per-message fees. | Gupshup bills you. |
| Best for | Volume, campaigns, anything official. | Keeping a number your customers already know, today. | Teams already invested in Gupshup. |
Connecting a Meta Cloud API number
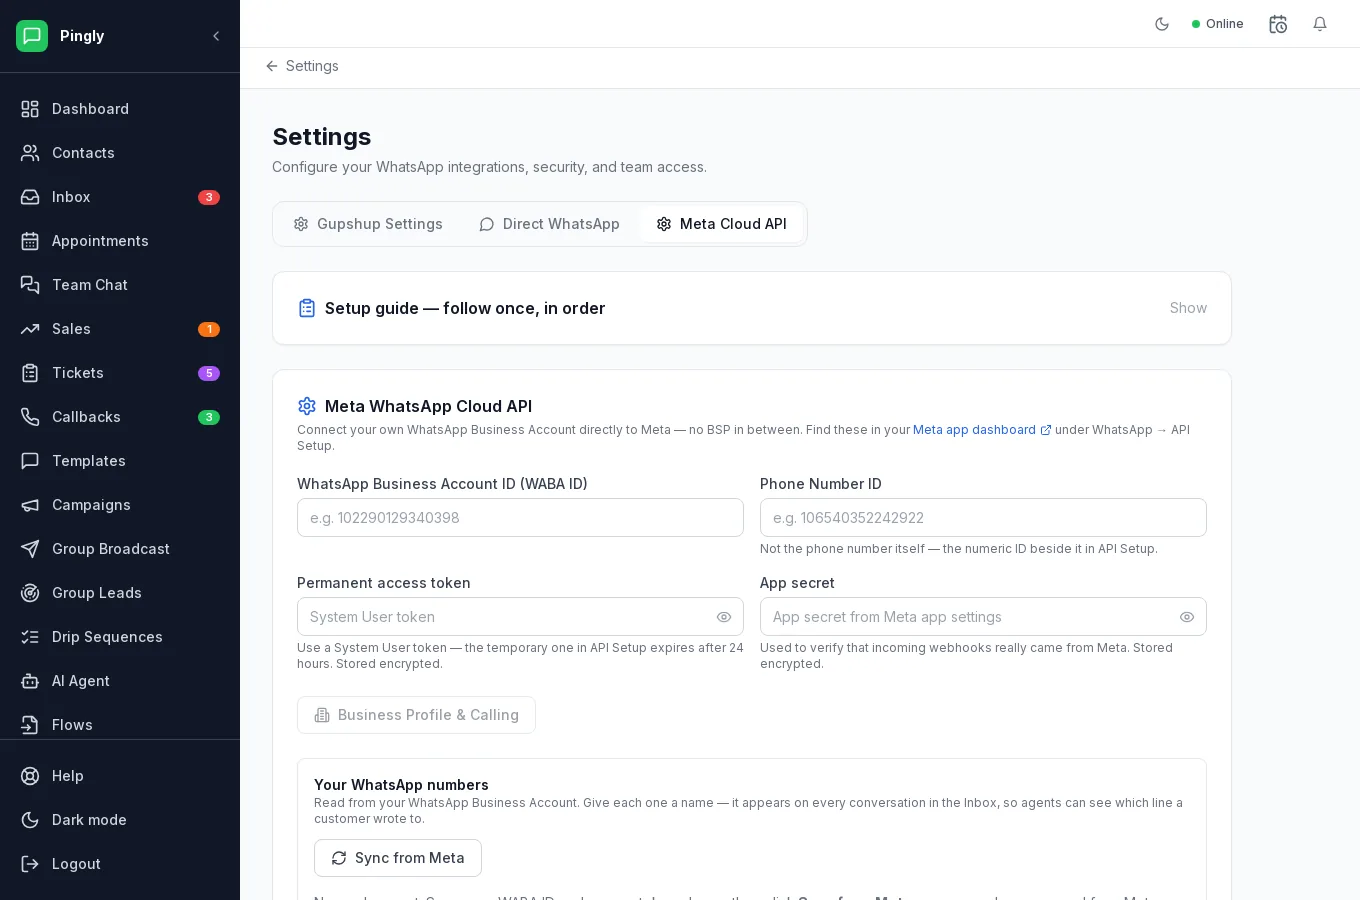
Go to Settings → Channels and open the Meta Cloud API tab. There is a Setup guide — follow once, in order at the top; open it and work down. Two routes lead to the same place.
- Have these ready before you startA Facebook Business account, a phone number that is not currently active on the WhatsApp app, and the ability to receive a call or SMS on it.
- Either: use Embedded SignupMeta’s own dialog walks you through signing in, picking or creating the WhatsApp Business Account and adding the number, and hands the credentials back to Pingly. There is also a Keep WhatsApp on my phone option, which lets you carry on using the WhatsApp app on that number alongside the API — your existing conversations, messages and contacts are kept.
- Or: enter the credentials yourselfFrom your Meta app dashboard under WhatsApp → API Setup, fill in the WhatsApp Business Account ID, the Phone Number ID (the numeric id beside the number, not the number itself), a Permanent access token and the App secret. Both are stored encrypted.
- Sync your numbers and name themSync from Meta reads the numbers on the account. Give each one a name — it appears on every conversation in the inbox, so agents can see which line a customer wrote to.
- Create and submit your first templateNothing can be sent outbound until one is approved. See Templates.
Connecting your own number by QR code
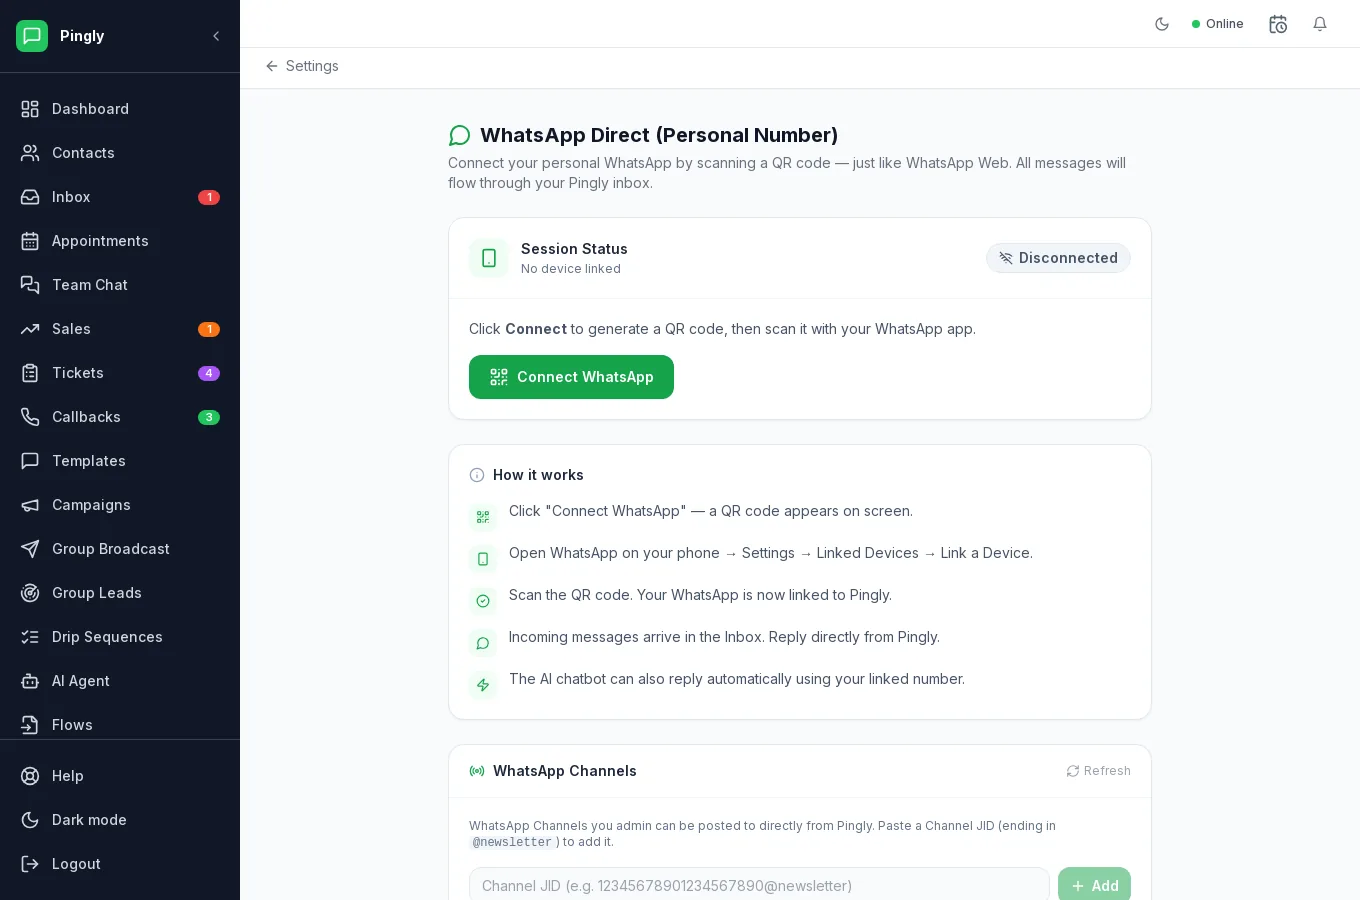
This links a normal WhatsApp number the same way WhatsApp Web does. Go to Settings → WhatsApp Direct.
- Press Connect WhatsApp and wait for the QR codeIt appears within a few seconds. The panel shows the session as Disconnected until you scan.
- On the phone, open WhatsApp → Settings → Linked Devices → Link a DeviceThen scan the code on your screen.
- Scan before it expiresThe code lasts about 60 seconds and then refreshes. An expired code is not a failure — just scan the new one.
- Wait for the history to importExisting chats and the phone’s address book come across at this point. This happens only when you first link: if you unlink and relink later, the history does not arrive again.
- Keep the phone online. As with WhatsApp Web, the phone is still the account.
- No templates. A Direct number sends free-form messages, so it is not subject to the 24-hour template rule in the same way — but it is also not an official API, and it should be paced sensibly.
- Group chats can be received, which is what Group Leads and Group Broadcast are built on.
Connecting Gupshup
Under Settings → Channels, open the Gupshup Settings tab and enter your API key, app token, app name and app ID from the Gupshup partner portal. Pingly fetches the phone number for you and generates the webhook URL to paste into Gupshup’s callback settings — there is a Test Connection button to confirm it works before you rely on it.
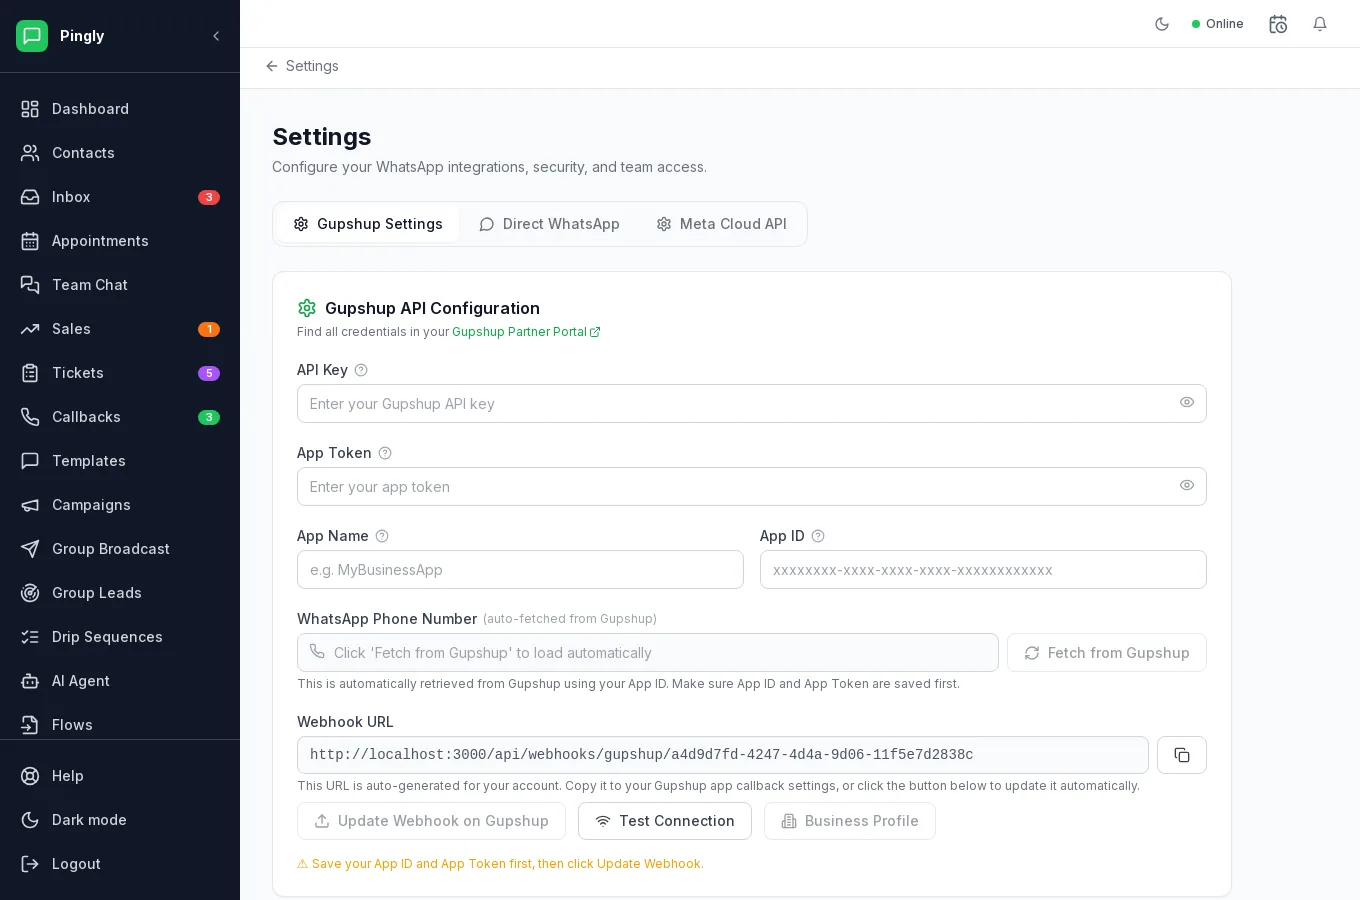
Your numbers, templates and message charges continue to be managed in Gupshup; Pingly reads and sends through it.
Checking it actually works
Do not assume a green tick on the settings page means messages will flow. From another phone, send a message to the connected number. It should appear in the inbox within a couple of seconds. Reply from Pingly and confirm it arrives. That round trip proves both directions at once.
If nothing arrives, check Settings → Numbers — it shows the connection state of each number, and a number that has dropped will say so there.